jQWidgets Mobile PhoneGap Application for Blackberry
In this tutorial you will learn how to create a simple mobile application that shows a BlackBerry 10 device's location on the click of a jqxButton. You may also be interested in how to easily create a similar application for Android, iOS or Windows Phone 8.
1. Prerequisites
The BlackBerry 10 development environment is available on Windows, Mac and Linux. We will be using the Windows 7 operating system to build the application in this tutorial.
You will also need to install Apache Cordova. Firstly, you will need Node.js, which you can download from http://nodejs.org. After you have installed Node.js, open Command Prompt and run the following to install Cordova:
C:\>npm install -g cordova
2. Install the BlackBerry 10 Native SDK
First, you need to install the Native SDK for BlackBerry 10. You can download it from https://developer.blackberry.com/native/downloads/.
The next step is to add the SDK's commant line tools to your system path. Go to Computer → Properties → Advanced system settings → Advanced tab → Environment variables. Edit the PATH variable and append the following to it:
;D:\bbndk\host_10_2_0_15\win32\x86\usr\bin
where D:\bbndk is the folder you installed the SDK in.
3. Obtain Code Signing Keys
To be able to test on a device or publish your apps to BlackBerry World, your system must be setup for code signing. Detailed instructions on how to do so are available here:
4. Create a Cordova Project
Open Command Prompt and type the following:
C:\>cordova create GeoLoc com.example.geoloc
Enter the newly created project folder:
C:\>cd geoloc
and add the BlackBerry 10 platform:
C:\geoloc>cordova platform add blackberry10
Note: during the adding of the BlackBerry 10 platform, an error may be encountered:
Error: node cannot be found in path. Aborting.
To fix this, you need to update the file init.bat, found in the following
path: C:\Users\Your_username\.cordova\lib\blackberry10\cordova\Cordova_version\bin.
Replace it with the version you can find here and retry adding the BlackBerry 10 platform.
5. Add the Geolocation API Plugin
Cordova implements device-level APIs as plugins. To install the geolocation plugin, run the following command:
C:\geoloc>cordova plugin add org.apache.cordova.geolocation
After the plugin's installation is complete, you will be able to access Cordova's
Geolocation API, such as the geolocation.getCurrentPosition method,
which will be showcased in this tutorial.
6. Modify the Project's www Folder
The next step is to modify the contents of the application's www folder
- the index.html and js\index.js files. We will also add
all required jQuery and jQWidgets JavaScript and CSS files.
Here is the source code of index.html in our example:
<!DOCTYPE html><!--Licensed to the Apache Software Foundation (ASF) under oneor more contributor license agreements. See the NOTICE filedistributed with this work for additional informationregarding copyright ownership. The ASF licenses this fileto you under the Apache License, Version 2.0 (the"License"); you may not use this file except in compliancewith the License. You may obtain a copy of the License athttp://www.apache.org/licenses/LICENSE-2.0Unless required by applicable law or agreed to in writing,software distributed under the License is distributed on an"AS IS" BASIS, WITHOUT WARRANTIES OR CONDITIONS OF ANYKIND, either express or implied. See the License for thespecific language governing permissions and limitationsunder the License.--><html><head><meta http-equiv="Content-Type" content="text/html; charset=UTF-8" /><meta name="format-detection" content="telephone=no" /><meta name="viewport" content="user-scalable=no, initial-scale=1, maximum-scale=1, minimum-scale=1, width=device-width, height=device-height, target-densitydpi=device-dpi" /><title>A jQWidgets mobile application, which demonstrates PhoneGap/Cordova's GeolocationAPI.</title><link type="text/css" rel="Stylesheet" href="css/jqx.base.css" /><link type="text/css" rel="Stylesheet" href="css/jqx.blackberry.css" /><style type="text/css">.bold{font-size: larger;font-weight: bold;}</style><script type="text/javascript" src="cordova.js"></script><script type="text/javascript" src="js/jquery-1.11.1.min.js"></script><script type="text/javascript" src="js/jqxcore.js"></script><script type="text/javascript" src="js/jqxbuttons.js"></script><script type="text/javascript" src="js/index.js"></script><script type="text/javascript">$(document).ready(function () {app.initialize();});</script></head><body><div class="app"><input id="jqxButton" type="button" value="Show location" /><table id="locationInfoTable" style="visibility: hidden; margin-top: 10px;"><tr><td class="bold">Latitude:</td><td id="latitude"></td></tr><tr><td class="bold">Longitude:</td><td id="longitude"></td></tr></table></div></body></html>
There are references to the jQWidgets main CSS file (jqx.base.css)
and the "blackberry" theme file (jqx.blackberry.css), jQuery and the
jQWidgets files required for jqxButton. The file index.js contains
the code of the app's functionality. Note that you also need to add a reference
to the file cordova.js, through which you can access Cordova's API,
but you do not have to add it to the scripts folder (www\js), beacause
it will be automatically added while the app is being built.
The app's initialization code is called in a $(document).ready() function
to make sure that all scripts have been properly loaded before the application itself
initializes.
Everything must be executed within the deviceready event handler, which
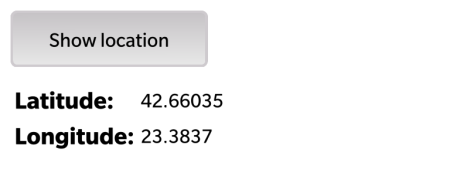
fires when Cordova has fully loaded. In the receivedEvent handler,
we initialize the jqxButton and pinpoint the device's location using the method
geolocation.getCurrentPosition. The callback function onSuccess
is called when the location has been successfully determined. The callback function
onError is called when there has been an error during location getting.
And here is the contents of the file index.js:
/** Licensed to the Apache Software Foundation (ASF) under one* or more contributor license agreements. See the NOTICE file* distributed with this work for additional information* regarding copyright ownership. The ASF licenses this file* to you under the Apache License, Version 2.0 (the* "License"); you may not use this file except in compliance* with the License. You may obtain a copy of the License at** http://www.apache.org/licenses/LICENSE-2.0** Unless required by applicable law or agreed to in writing,* software distributed under the License is distributed on an* "AS IS" BASIS, WITHOUT WARRANTIES OR CONDITIONS OF ANY* KIND, either express or implied. See the License for the* specific language governing permissions and limitations* under the License.*/var app = {// Application Constructorinitialize: function () {this.bindEvents();},// Bind Event Listeners//// Bind any events that are required on startup. Common events are:// 'load', 'deviceready', 'offline', and 'online'.bindEvents: function () {document.addEventListener('deviceready', this.onDeviceReady, false);},// deviceready Event Handler//// The scope of 'this' is the event. In order to call the 'receivedEvent'// function, we must explicity call 'app.receivedEvent(...);'onDeviceReady: function () {app.receivedEvent('deviceready');},// Update DOM on a Received EventreceivedEvent: function (id) {// creates jqxButton$("#jqxButton").jqxButton({ theme: "blackberry", width: 150 });var me = this;$("#jqxButton").click(function(){navigator.geolocation.getCurrentPosition(me.onSuccess, me.onError);});},// successfully determined positiononSuccess: function (position) {var lat = position.coords.latitude;var lng = position.coords.longitude;$("#latitude").text(lat);$("#longitude").text(lng);$("#locationInfoTable").css("visibility", "visible");},// unsuccessfully determined positiononError: function (error) {alert(error.message);}};
Finally, build the project:
C:\geoloc>cordova build
7. Add a Target to Your Project
Before testing an app on either an emulator or a device, you need to add a target to your project. Each is identified with a unique name, and associated with an IP address. Before proceeding, make sure your BlackBerry 10 device is connected to your computer.
7.1. Obtain the Device's IP Address
Go to Settings → Security and Privacy → Development Mode. Toggle Use Development Mode to On. You can find the Development IP Address under it.

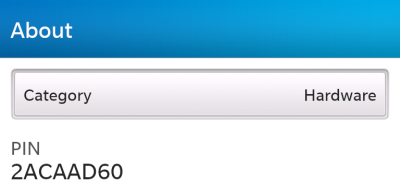
7.2. Obtain the Device's PIN
You will also need to get the device's PIN from Settings → About → Category Hardware:
7.3. Add the Target
Run the target command-line utility to associate a name with an IP address, device password and PIN:
C:\geoloc\>platforms\blackberry10\cordova\target.bat add
        mydevice 169.254.0.1 -t device --password devicepass123 --pin 2ACAAD60
where:
--passwordrefers to your device's password (e.g.devicepass123);--iprefers to the Development IP Address (e.g.169.254.0.1).
8. Run the Application
Before deploying the application on your mobile device, make sure that you have
registered with the signing authority using your .csj registration
files for application signing (Step 3). You can then run the application
from the command line:
C:\geoloc\>cordova run blackberry10
If a debug token is not yet set up for the device, an error message prompts you to use the platform run script instead with the password you provided when registering for signing keys:
C:\geoloc\>platforms\blackberry10\cordova\run.bat --device
        --keystorepass storepass123 --devicepass devicepass123
where:
--keystorepassrefers to the password you provided when registering for signing keys (e.g.storepass123);--devicepassrefers to your device's password (e.g.devicepass123).
The application is now installed and ready for use!
You can download the entire GeoLoc project here.